“On an Island”

I was catching up on Top Chef last night, and all the contestants were killing the time by asking each other if they were on an island, “what three foods would you bring?’ It then led to a Bravo poll and the top choices were bread and cheese.  Bread and cheese???? I guess I could see that, but I was surprised no one chose anything sugary. Surprised in a good way.

What would you bring with you?

I always say it would be shrimp, eggs and avocado. Although if I’m on an island, I guess I could fish my own shrimp…

Moving Forward- Open Doors in 2014!

So I’m sorry I never finished my cookie countdown- I simply ran out of time. And I actually had posted double recipes in some posts, so I wouldn’t have made it to 15 days anyway…

I like to call today “Limbo Day.” It’s a day where everyone looks back at the past, while at the same time make promises for the future. I personally think this is a dangerous thing to do.

I know that’s a bold statement, but hear me out.

When we make goals based on past experiences, we lock ourselves in to only changing what we already know about ourselves. We keep the doors closed to ‘the unknown’ and we turn our backs on all the possibilities that are out there for us.

One year later, I launched a photography business with my husband, lost 30 lbs, became a VP of my local, am now a cross fit enthusiast,  and a unit leader for my group of teachers…and I didn’t plan for ANY of it. I never made any resolutions last year, I just kept the doors open for change. And change I got!

I can only dream of all things that await me in 2014! As long as I keep the door open, good things will come.

So if there’s something you want for 2014- make one resolution:

Open the door for change. It may not be exactly what you were expecting, but it may be something better!!!

PS- New Year’s is totally hyped up anyway to sell gym memberships and diet programs. Don’t fall for it…

Christmas Cookie Countdown Day 10: Festive Thumbprints

I do these every year now, I love them!!! This is what a Christmas cookie is all about. It the cookie that earns it right on the cover of a magazine.


Festive Thumbprint Cookies

2/3 cup butter, softened

1/2 cup sugar

2 egg yolks

1 tsp vanilla

1 1/2 cup flour

3 dozen or so candy melts.

1. In a mixer, cream the butter for 30 seconds. Add sugar and cream together.

2. Add egg yolks and vanilla, scraping sides from time to time.

3. Add flour.

4. Chill dough for 1 hour.

5. Preheat oven to 375F. Roll dough into 1 inch balls. Roll dough balls into colored sugar and place on a greased cookie sheet.

6. Push thumb into dough to flatten and bake for 10-12 minutes.

7. Take out of oven and place colored candy melt into center. Put back in oven for 1 minute.

8. Use a toothpick to swirl melted chocolate.

Image

Christmas Cookie Countdown- Day 9: Berry Sage Thumbprints

I don’t usually bake ‘fruity’ cookies. I’m not sure why…I guess I think of Christmas cookies as being sugary, chocolately, sprinklely and VERY naughty!!!!

Well these thumbprints are nice!

Berry Sage Thumbprints

(from the 2013 ‘100 Best Cookies’ by Better Homes and Gardens)

2 C flour

2/3 C yellow cornmeal

1 1/2 tsp. dried sage, crushed

1/4 tsp. baking powder

1 C butter, softened

1 C packed brown sugar

2 egg yolks

2 tsp. finely shredded lemon peel

1 1/2 tsp. vanilla

1/4 C blackberry preserves

1. Preheat oven to 350F. In a medium bowl, mix all the dry ingredients together. Set aside.

2. In a mixer, beat the butter until creamy. Add the brown sugar, scraping the sides down occasionally. Add the egg yolks, lemon peel and the vanilla.

3. Add the flour and beat until completely combined.

4. Shape dough into 3/4″ balls and place 1 inch apart on an ungreased baking sheet. Press thumbs into center of the balls. Spoon about 1/4 tsp. of the preserves in the ‘wells’ where you pressed with your thumbs.

5. Bake for 10 minutes or until edges become golden. Move to a wire rack and cool.

photo-37

Christmas Cookie Countdown- Day 8: White Chocolate and Crème de Menthe Shortbread

I’m all about shortbread this Christmas. I think it’s because I don’t need any machinery to make it! You see, using a food processor or a kitchen aid mixer mean amore dishes. And as Christmas creeps closer, I try to limit as much ‘hassle’ as I can. It’s hard to do as an artist- the cookies should look perfect, the wrappings should look like they came from a magazine, all the ‘traditional’ foods are ready to be cooked. It’s much like a ‘nesting’ phase…

So these cookies kinda rock my world. And a cookie hasn’t down that to me in a really long time. I think the white clocolate glaze is what does it for me, but overall this is a great cookie!!!!

White Chocolate Crème de Menthe Shortbread

(from the 2013 Better Homes and Gardens 100 Best Cookies Magazine)

2 1/2 C flour

1/2 C sugar

1 cup butter, cut up

1 tbsp. green crème de menthe

6 oz. white chocolate baking chocolate

1 tbsp. shortning

1/4 tsp. mint extract

1. In a large bowl, add all dry ingredients together. Using a pastry blender, cut in butter until mixture resembles fine crumbs and starts to cling. Using a fork, stir in crème de menthe. Form mixture into a ball and knead until smooth.

2. Divide dough in haif, shape each half in to a 6″ roll; turn roll, flattening each side. Wrap each roll in plastic wrap and freeze for 45-60 minutes.

3. Preheat oven to 325F. Cut rolls into slices and place on an ungreaded cookie sheet. Slices should be 1/4″ thick and be placed 2 inches apart from each other on an ungreased cookie sheet. Bake for 10 to 12 minutes or until edges are golden brown. Transfer to a wire rack and cool.

4. While cookies are cooling heat chocolate and stir in shortening once melted. Add mint extract and drizzle over cookies.

5. Allow chocolate to harden and store with a layer of waxed paper between each layer of cookies.

photo-36

Christmas Cookie Countdown- Day 6: Red Velvet Shortbread

I’m on a shortbread kick the past few Christmases. I guess it’s because I’m just learning now all the things you can do with it. Last year it was fun putting the rosemary in it- loved it! This year, I saw some really cool new ways to do short bread. So I’m sharing. One thing I’ve definitely learned though about shortbread: hand cut the butter in! This recipe directs you to use a food processor. I did, and the dough never really came together like it would it I did it by hand. I also think they would have been ‘redder’ if I hand cut it. So I’m altering this recipe to suit those needs.

Red Velvet Shortbread Cookies

1 3/4 C flour

1/2 C sugar

2 tbsp. unsweetened cocoa powder

1/4 tsp. salt

1/2 C butter, cut up (always cold butter!)

1 tbsp. red food coloring

3 oz. white baking chocolate, coarsely chopped

1 1/2 tsp. shortening

1. Preheat the oven to 325F. In a large bowl, add all the dry ingredients together.

2. Add butter and red food coloring. Using a pastry blender, cut in the butter and food coloring until the mixture resembles fine crumbs and starts to stick together. Form mixture into and ball and knead until smooth.

3. On a lightly floured surface, roll out the dough 1/2 inch thick. Cut with a smaller cookie cutter- about 3″ max. Place cookie cutouts on an un-greased cookie sheet.

4. Bake for 20-25 minutes or until centers are set. Transfer to a wire rack to cool completely.

5. In a small saucepan, melt the chocolate and shortening until smooth. Drizzle chocolate over cooled cookies and let the chocolate set before storing.

****Healthy Tip:

It’s good to workout in the cold weather. It get your blood pumping and helps burn fat. Make sure you dress warm and wear a hat and gloves, but it’s perfectly fine to take a jog in the cold! DO IT! Especially if you ate one of these cookies!!!!!

photo-35

Christmas Cookie Countdown- Day 5: Spiced White Chocolate Brownies

My husband LOVES these. So do I, but I can resist the temptation more than he can. They’re different- maybe a little more gourmet than your typical brownie. Most brownies come in a box nowadays, but what if I told you making them from scratch maybe only adds an extra 5 minutes to the brownie baking process? So let’s liberate ourselves, and think ‘outside the box!!!’

Seriously though, these are pretty awesome. And if any of you want to make these, and see me regularly, let me know you’re making them and I save you some $$$$ on the crystalized ginger and cardamon….I have extra.

Spiced White Chocolate Brownies

(From Better Homes and Garden’s 2011 Christmas Cookie Special Edition Magazine)

2 1/2C flour

1 1/2 tsp. baking powder

1 tsp. ground cardamon

1 tsp. ground cinnamon

1/2 tsp. ground ginger

1/4 tsp. salt

1 C butter, softened

1 3/4 C packed brown sugar

3 eggs

1 tbsp. rum( optional, but I use it)

1 tsp. vanilla

6 oz. white baking chocolate, chopped

1 tbsp. finely chopped crystalized ginger

powdered sugar, optional

1. Preheat the oven to 350. Line a 9×13 baking pan with foil and grease the foil. Set aside

2. In a medium bowl, mix the flour,spices, baking powder, salt and set aside.

3. In a mixer, beat the butter on med-high for 30 seconds. Add the sugar and beat until combined, scraping the sides of the bowl occasionally. Beat in eggs, rum and vanilla until combined. Beat in the flour. Stir in the white baking pieces and crystalized ginger.

4. Move batter to the pan and spread evenly. This batter is REALLY thick, so be careful.

5. Bake for 30 minutes in the preheated oven. Cool in the pan on a wire rack. Once cool, lift the brownies out by the foil and slice. They say they make 32 brownies, but I cut them into bite sized pieces, so I get way more than that.

6. Sprinkle with powdered sugar if desired.


***Healthy Tip:

It’s snowing pretty hard today. Don’t look at shoveling as a chore!!! Think of it as a little cardio!!! Put some pep in that shovel!!!!

Christmas Cookie Countdown- Day 2 Vienna Cutouts

This is a repost from last year, but a classic I will ALWAYS make. Here’s why:


I know this isn’t the exact recipe that she made, but this cookie reminds me of my Grandma Ryan. She used to bake a simple sugar cookie, and instead of icing them all, she would sprinkle colored sugar on the cookies before baking them, making them a pretty and simple cookie. I remember making them with her a few times, but what I remember more is seeing them on a fancy plate in the kitchen on Christmas Night, after dinner with the family. Her house was truly magical to me at Christmas. I think I have more memories of her house during the holidays then I do of the house I grew up in! Either way, these cookies bring me right back to that place. I’m sure they didn’t have almond in the original recipe, but I like the flavor of almond and somehow these cookies bring back to Grandma Ryan. She passed away this past February, so there was no question these cookies had to be made this year…

The recipe comes from 2011’s Better Homes and Gardens Christmas Cookie Special Edition. There’s a lot of great cookie gems I go to Christmas baking. I will feature other through out the countdown. Anyways, here the recipe:

Vienna Almond Cutouts

3/4 cup slivered almonds, toasted

2 1/4 cups flour

1/4 tsp salt

1 cup butter, softened

3/4 cups sugar

1 egg

1 tsp vanilla

1/2 tsp lemon zest

1/4 tsp almond extract (they say it’s optional-I use it!)

1. In a food processor, pulse the toasted almonds until they are finely ground. In a bowl combine the flour, almonds and salt.

2. In a mixer, beat the butter and sugar until creamy and fluffy at medium speed. Add the egg, lemon, and vanilla and almond extract.

3. Beat in as much as the flour mixture as you can, scraping the sides occasionally.

4. Divide dough in half and wrap in saran wrap. Chill in fridge for 2 hours or until firm.

5. Roll out about 1/4″ thick and cut out with cookie cutters. This is where I add the colored sugar!

6. Bake at 350F for 8 minutes on an ungreased cookie sheet.

7. Cool on a wire wrack and enjoy!!!!


***Healthy Tip

Put the soda and sugary drinks down! In fact, put the diet drinks down too! Water is the best way to stay hydrated and flush your system. Dink more water this holiday season. Drink a glass before a meal to make you feel fuller faster- you won’t eat as much! Drink a glass when you first wake up to start your day off right! Give yourself the best Christmas gift ever- a hydrated you!!!!!


15 Days of Christmas Cookies- Day 1

Last year I did this and it was quite a hit. So of course, I must deliver and bake 15 batches of cookies before the big day!!!! Some will be new, some will be old, but either way my Kitchenaid Mixer has been training all year for this event!!!! I will admit that I’ve already started…

This year is a little different though. I’ve made some lifestyle changes, and can honestly say I probably won’t be eating any of these cookies- although the biscotti gets me every time!!!! I know many of my followers are health conscious, so along with each cookie post, I will also add a health tip keep us all in check this holiday-eating season. I know that for people that struggle with weight and dieting despise this time of year…I’m one of them! However, there are so many GOOD choices we can make each day to at the very least MAINTAIN our weight during this time.

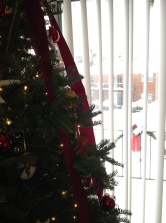
Today is the first real snow of the season. School’s closed, and I’m going to bake my little heart out. There is nothing I love more than sipping coffee with a biscotti and watching the snow from the couch. The tree is lit, the Yankee Candles are burning. You can’t get more Christmas than this…

photo-34

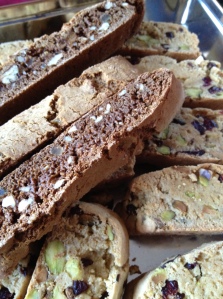
So to kick this countdown off, I’m going to start with the biscotti. This year I’m making my usual Pistachio Cranberry and a new one- Chocolate Malted Milk Biscotti. Last year I didn’t care for the gingerbread as much and I found it lingered in the house for a while. The new ones are definitely not sticking around!!!!!

Chocolate Malted Milk Biscotti

(as seen in Better Homes and Gardens 2012 Christmas Cookie Magazine)

1 3/4 C Flour

3/4 C unsweetened cocoa powder

1/4 C malted milk poweder

1 tsp. baking soda

1/2 tsp. salt

3 eggs

1/4 C butter, melted

1 C sugar

1 tsp. vanilla

1 C coarsely chopped malted milk balls

1/2 cup milk chocolate chips

1. Preheat oven to 325F. Line a large cookie sheet with parchment paper.

2. In a large bowl stir together flour, cocoa powder, malted milk powder, baking soda and salt. Make a well in the center of the flour mixture; set aside. In a medium bowl, whisk together eggs, melted butter, sugar and vanilla. Add the egg mixture to the dry ingredients. Stir until the dough starts to form a ball. Stir in malted milk balls and chocolate chips (dough will be crumbly). Knead the dough until it comes together.

3. Turn the dough onto a lightly floured surface. Divide in half and shape each half into a 10 inch log. Place the logs onto the parchment paper and flatten the logs so they are 2″ wide. The logs should be 3″ apart from each other.

4. Bake for 25 minted. Cool on cookie sheet on a wire rock for at least an hour.

5. Transfer flattened rolls to a cutting board and slice rolls diagonally about 1/2 inch thick. Place slices cut side down back onto parchment paper and bake for 8 minutes. Take out of oven, flip, and bake for another 8 minutes. Transfer to a wire rack and cool. Biscotti will crisp as they cool.

Cranberry Pistachio Biscotti

( As seen in Christmas Cookies: 50 Recipes to Treasure for the Holiday Season by Lisa Zwirn)

3 cups flour

2 tsp. baking powder

1/4 tsp. cinnamon

1/4 tsp. salt

8 tbsp. unsalted butter, softened

1 cup granulated sugar

1/2 cup light brown sugar

2 large eggs

1 1/2 tsp. vanilla

1 tbsp. finely grated orange zest (from 1 orange)

1 1/4 cup shelled pistachios (do not chop)

1 cup dried cranberries ( I use Cherry Craisins)

1. preheat the oven to 350F. Line a large cookie sheet with parchment paper

2. In a medium bowl whisk the flour, cinnamon, salt and baking powder together.

3. Using an electric mixer, beat the butter in a large bowl until creamy. Add the sugar and brown sugar and beat until fully blended. Beat in eggs, the vanilla and orange zest. On low speed, mix the flour mixture just until the dough starts to clump together. Mix in the pistachios and cranberries. Using your hands or rubber spatula, gather the dough into a ball and divide in half.

4. With lightly floured hands, form each half of dough in to a log that is 13″ by 2.5.” Make sure each log is 3 inches apart.

5. Bake for 30-35 minutes, rotating the sheet from front to back (I never do this! :P) halfway through baking, or until the loaves are golden and the top feels firm when gently pressed. Transfer the sheet to a cooling rack for 10 minutes. Reduce the temp of the oven to 325F.

6. Peel the loaves off the parchment and slice them diagonally on a cutting board. Be sure to use a SHARP serrated knife, as the loaves are crumbly. Slice the cookies 3/4 inch thick. Place them back on the cookie sheet, cut sides up. Put back into oven for 10 minutes. Flip cookies to other side and bake for another 10 minutes.

7. Take out and transfer to wire cooling rack. Cool for about 20 minutes. They keep for 2 weeks. If they get a little soft, you can perk them up in a 350F toaster oven for 5 minutes.

photo-10


***Healthy Tip

If you’re GOING to eat a cookie, or two, or three…be sure to take a brisk walk- around 30 minutes. Or maybe clean a room. You will burn off what you just ate.